Pelco CC3701H-2X User Manual
Browse online or download User Manual for Security cameras Pelco CC3701H-2X. Pelco CC3701H-2X User's Manual
- Page / 24
- Table of contents
- BOOKMARKS
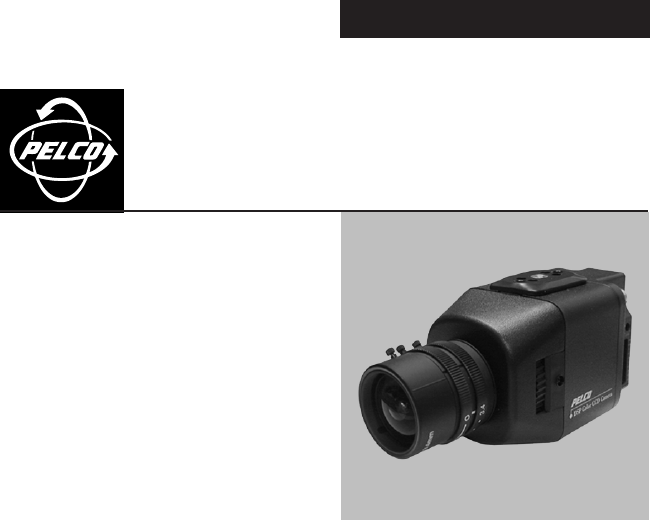
- CC3701H-2 and CC3701H-2X 1
- DSP Color Camera 1
- 2 C1937M-C-ML (3/05) 2
- Regulatory Notices 3
- Description 3
- Camera Layout 4
- Installation 4
- CAMERA MOUNTING 5
- POWER AND VIDEO CONNECTIONS 5
- 6 C1937M-C-ML (3/05) 6
- Back Focus Adjustment 7
- Switch Settings 8
- C1937M-C-ML (3/05) 9 9
- 10 C1937M-C-ML (3/05) 10
- Specifications 11
- REVISION HISTORY 12
- PRECAUCIÓN: 13
- RIESGO DE DESCARGA 13
- ELÉCTRICA. NO ABRIR 13
- Descripción 14
- Avisos Reglamentarios 14
- Composición de la Cámara 15
- Instalación 15
- 16 C1937M-C-ML (3/05) 16
- C1937M-C-ML (3/05) 17 17
- Ajuste de Foco de Fondo 18
- C1937M-C-ML (3/05) 19 19
- 20 C1937M-C-ML (3/05) 20
- C1937M-C-ML (3/05) 21 21
- Especificaciones 22
Summary of Contents
®INSTALLATION/OPERATIONCC3701H-2 and CC3701H-2XDSP Color Camerawith EDREnglishEspañolC1937M-C-ML (3/05) c1937-C-ML.book Page 1 Monday, April 11, 200
10 C1937M-C-ML (3/05)ENGLISH Camera Synchronization (AC Operation Only) When using more than one camera power supply, a brief vertical roll may occ
C1937M-C-ML (3/05) 11ENGLISH Specifications GENERAL CCD Sensor 1/3-inch interline transferPicture Elements CC3701H-2 768 (H) x 494 (V)CC3701H-2X 752
PRODUCT WARRANTY AND RETURN INFORMATION WARRANTY Pelco will repair or replace, without charge, any merchandise proved defective in material or workma
C1937M-C-ML (3/05) 13ESPAÑOL Instrucciones de Seguridad y Advertencias Importantes Antes de instalar y usar este producto, tenga en cuenta las sigui
14 C1937M-C-ML (3/05)ESPAÑOL Avisos Reglamentarios Este equipo ha sido probado y se ha determinado que cumple con los límites de un dispositivo digi
C1937M-C-ML (3/05) 15ESPAÑOLComposición de la CámaraFigura 1. Composición de la cámaraInstalaciónMONTAJE DE LA LENTELa cámara puede utilizar lentes
16 C1937M-C-ML (3/05)ESPAÑOLMONTAJE DE LA CÁMARAUse un tornillo 1/4-20 estándar (suministrado) con una longitud de rosca máxima de 3/8 pulgada
C1937M-C-ML (3/05) 17ESPAÑOLSólo para suministro CA - Si desea conectar más de una cámara al mismo transformador, conecte un lado del transformador a
18 C1937M-C-ML (3/05)ESPAÑOLLente de iris automático de comando directo (CC) Configure el interruptor del selector de modo de lente en AID (configuraci
C1937M-C-ML (3/05) 19ESPAÑOLConfiguración de Interruptores Figura 6. Configuración predeterminada de interruptores DIPNOTA: En la mayoría de las cond
2 C1937M-C-ML (3/05)ENGLISH Important Safeguards and Warnings Prior to installation and use of this product, the following WARNINGS should be observ
20 C1937M-C-ML (3/05)ESPAÑOLNOTA: Si se aplica corriente CC cuando el interruptor INT/LL está en posición LL, la cámara no funcionará. Cambie el mod
C1937M-C-ML (3/05) 21ESPAÑOLSincronización de Cámara (Sólo para Suministro Ca) Al utilizar más de una fuente de suministro de energía de cámara, se
22 C1937M-C-ML (3/05)ESPAÑOLEspecificacionesGENERALESSensor CCD Transferencia interlineal de 1/3 pulgadaElementos de imagen CC3701H-2 768 (H) x 494 (
INFORMACIÓN SOBRE GARANTÍA Y DEVOLUCIÓN DEL PRODUCTOGARANTÍAPelco reparará o reemplazará, sin cargo, toda mercadería que se compruebe que tiene defect
United States|Canada|United Kingdom|The Netherlands|Singapore|Spain|Scandinavia|France|Middle East Worldwide Headquarters3500 Pelco WayClovis, Califo
C1937M-C-ML (3/05) 3ENGLISH Regulatory Notices This equipment has been tested and found to comply with the limits of a Class B digital device, pursu
4 C1937M-C-ML (3/05)ENGLISH Camera Layout Figure 1. Camera Layout Installation LENS MOUNTING The camera can use a fixed iris, manual iris or auto i
C1937M-C-ML (3/05) 5ENGLISH CAMERA MOUNTING Use a standard 1/4-20 screw (provided) with a maximum thread length of 3/8-inch (10 mm) for top or botto
6 C1937M-C-ML (3/05)ENGLISH AC operation only - If you are wiring more than one camera to the same transformer, connect one side of the transformer
C1937M-C-ML (3/05) 7ENGLISH Lens Setup and Focus Procedures Video Drive Auto Iris Lens Set the lens mode selector switch to AIV. Switch the ESC and
8 C1937M-C-ML (3/05)ENGLISH Switch Settings Figure 6. DIP Switch Default Settings NOTE: Under most conditions, no setting of switches will be r
C1937M-C-ML (3/05) 9ENGLISH NOR/SHP - Sharpness NOR (Default setting) - Sets the camera to normal sharpness mode. SHP - Enables the Sharpness
More documents for Security cameras Pelco CC3701H-2X

Related products and manuals for Security cameras Pelco CC3701H-2X
 (16 pages)
(32 pages)
(32 pages)
(24 pages)
(68 pages)
(12 pages)
(36 pages)
(56 pages)
(44 pages)
(44 pages)
(24 pages)
(13 pages)
(12 pages)
(12 pages)
(16 pages)
(32 pages)
(32 pages)
(24 pages)
(68 pages)
(12 pages)
(36 pages)
(56 pages)
(44 pages)
(44 pages)
(24 pages)
(13 pages)
(12 pages)
(12 pages)
© 2020, manymanuals.com. All rights reserved. | 1.035 s |
 Manymanuals.com
 Manymanuals.de
 Manymanuals.fr
 Manymanuals.it
 Manymanuals.pl
 Manymanuals.cz
 Manymanuals.es
 Manymanuals-pt.com
Comments to this Manuals